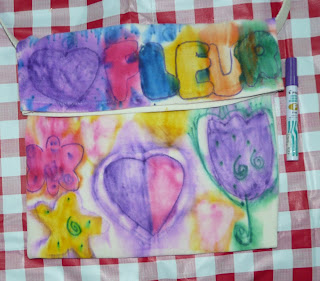
After the girls (the boys are, unfortunately for them, in the minority ...) decided by unanimous vote to do a butterfly craft this week, we planned these mobiles. Cutting 13 butterflies was a bit time consuming for the kids who are still a bit challenged by cutting curves, but they all got a lot of practice today!
Thursday, September 30, 2010
Thursday, September 23, 2010
Sept 23, 2010: big wall flowers
This week, we made big paper flowers the children can hang on the walls of their rooms. The original inspiration came from Blue Cricket Design (Thank you Becca!) but as it is hard to find scrap book paper in Manila, we had to make some adjustments. Instead, we used gift wrap glued to bond paper so that the petals would be rigid enough to stand up. As usual, we had children who believe that more-is-more and used nearly every patterned paper we had! At the other end of the spectrum, we have one 4 year old who has decided that less-is-more and limited herself to 2 colors only!
Sept 16, 2010: Flowerpot scarecrows
These not-so-scary-scarecrows turned out so well, I couldn't resist posting nearly all photos! Sorry!
Saturday, September 11, 2010
Tutorial: Halloween Trick-or-Treat buckets
This tutorial appeared in the October issue of the MADS (Mother and Darlings Support group) magazine and are posting it here for the non-MADS members.
Every self respecting Trick-or-Treater needs a mummy bucket to collect their candy and this one is easy to make with your children.
MATERIALS
- Plastic flower pot approximately 8 inches (21cm) diameter
- Gauze bandages: 2 rolls 2inches (5cm) wide
- Any PVA glue such as Elmer’s or National Bookstore’s Best Buy diluted 50/50 with water
- White paper torn into strips and a small piece of black paper
- A pair of large googly eyes. National Bookstore often carries them.
- A pair of large googly eyes. National Bookstore often carries them.
- Rope or string of some sort for the handle. If the string is too thin, you can always cut three strands and braid into a thicker rope. You can find the string we used in hardware stores.
INSTRUCTIONS
1. Drill 2 holes on opposite sides of the flower pot for the handles (if you don’t have a drill, you can tie a piece of string under the rim of the flower pot once finished and attach the handle to that).
2. Cover the flower pot with torn pieces of white paper using lots of diluted glue. One layer is enough as it is just to cover the bucket and make sure none of the brown color shows through the bandages.
3. Stick a rectangle of black paper on to the bucket between the 2 holes and at an appropriate height for the eyes. This will be the part of the mummy’s face which will be peaking out of the bandages. Scrunch up a small piece of paper and tape just below the eyes for the mummy’s nose.
4. Starting along the top edge wrap the gauze bandage around the bucket gluing every now and again with the diluted white glue. Overlap the edges so the bucket will be well wrapped but leave an opening on the black paper for the eyes. Glue the eyes on to the black paper. If you can’t find googly eyes, you can also cut out 2 white circles of paper and draw eyes on them instead.
5. Use a pair of scissors to open up the holes which you drilled for the handles and thread the rope through. Tie a knot in each end.
If you want to make a pumpkin bucket, wrap the flowerpot with strips of orange crepe paper instead. Glue scrunched up green crepe paper along the top edge and glue on Jack O'Lantern features along the top edge.
For a Black Cat, use black crepe paper to wrap the bucket and scrunch along the top edge. Use thick black paper or board for ears and cut the features out of colored paper and glue on.
Happy Trick-or-Treating!
For a Black Cat, use black crepe paper to wrap the bucket and scrunch along the top edge. Use thick black paper or board for ears and cut the features out of colored paper and glue on.
Happy Trick-or-Treating!
Subscribe to:
Posts (Atom)


